Monday, December 14, 2009

Peppermint Bark

PhotobucketI have a feeling this is going to become a Christmas family tradition in our home. The trick good bark is good chocolate--don't get the cheap, waxy stuff. I went to Kitchen Kneads and bought several pounds of their Guittard Old Dutch, and some of their good white chocolate (I can't remember the brand). I have heard that Bob's Candycanes are the best, not Spangler, but I found that out after I had already bought several boxes of Spangler. You can make this anyway you want--I added more milk chocolate (about 1/4 lb. more) than what the recipe called for. You can use dark chocolate, or any combination you want. Some people use all white. It's totally up to you!

1 lb (16 oz) chocolate (I like milk)
12 oz white chocolate
1/4-3/4 t peppermint extract (I only used 1/4 and it was perfect-not too strong)
Seven 6-inch candy canes (maybe more)

-Line bottom of jelly roll size baking sheet with foil.
-Bring water to a boil in the bottom of a double boiler (I don't have one so I just used a pot and a stainless steel bowl over the top of it. Make sure it's a good fit so not a lot of steam gets out on the chocolate, and the water in the pot should not touch the bottom of your bowl).
-Once boiling, remove from heat. Put in milk chocolate and constantly stir until all melted.
-Pour into your lined baking sheet and spread so thickness is just under a quarter of an inch. I jiggle the pan back and forth on a flat surface to get the chocolate nice and even and flat.
-Let chocolate sit a little then put in fridge (or outside in the cold garage or porch) and let set-up for 20 minutes.
-While first layer is chilling, crush candy canes. A hammer works great--careful for a rolling pin, they will put dents in it. Freezer bags are a little stronger and will hopefully end up with less holes in them. I like the candy canes nice and fine with slight chunks here and there.
-Take pan out of fridge and let it warm slightly at room temp for a couple minutes before adding the white layer. This will help the white layer to adhere better so that when you break up the bark the layers won't separate.
-Repeat the double boiling process for the white chocolate. Don't use soap when rinsing your bowl from the milk chocolate, just rinse with hot water and melt the white.
-I added the peppermint extract to the white layer, but you can do it any way you want. Mix it in well then spread white carefully on top of milk chocolate. Careful, it will start melting the chocolate underneath it, so be careful when spreading or else you'll get a swirl effect going on.
-Jiggle pan again to even out. Immediately sprinkle candy canes on top. I completely covered the bark very generously until no white chocolate was really showing.
-Let set in fridge or cold for 20 minutes. Then stab and break apart with a knife. It will split nicely when it's really cold, but if you want more uniform pieces let it warm up a little and you can just cut with a knife how you want it.
-Makes just under 2 lbs of candy.
Photobucket

Wednesday, December 2, 2009

Slow Cooked Baked Potato Soup

I can't believe I haven't put this recipe on here yet! It's one of those unforgettable recipes. It's from "A Year of Slow Cooking" blog. It's a keeper, trust me. I'm making it today for tonight's dinner. It's sinfully delicious. Can't wait.

5 lbs potatoes, peeled and diced in 1 to 2-inch chunks
1 onion, diced
4 cloves garlic, minced
1 teaspoon seasoned salt
1/2 teaspoon black pepper
1/2 teaspoon red pepper
2 quarts chicken broth
2 (8-ounce) packages cream cheese, to add at the end (I use one pkg.)
crumbled bacon, green onion, chives, or cheddar cheese as garnish (optional but you'll definitely want them)

-Use a 6 quart or larger slow cooker. Peel and dice the potatoes, and put them into the stoneware. Add onion and garlic. Sprinkle in the seasonings, and pour in the broth. Cover and cook on low for 8 hours, or on high for 4. The potatoes should be fork-tender. You can use a potato masher to mash the potatoes in the soup, or a hand-held immersible blender. I suppose you can also leave the potatoes in chunks, if you really wanted, but I wanted a smooth soup.

-After smashing the potatoes, crumble in both packages of cream cheese, and put the lid back on. Cook on high for about 30 minutes, or until the cream cheese is completely dissolved. Stir a few times during the 30 minutes.

-Garnish with crumbled bacon, green onion or chives, and cheddar cheese if desired.

Wednesday, November 18, 2009

Pumpkin Apple Streusel Muffins

PhotobucketThis is my very favorite muffin recipe. I discovered it last year I think and love making it as much as possible! These are so moist and delicious-a must when it's autumn! This also makes great bread, just put in greased loaf pans and add time-20 or so more minutes, depending on loaf pan size (until toothpick comes out clean).

2 1/2 c flour
2 c sugar
1 T pumpkin pie spice
1 t baking soda
1/2 t salt
2 eggs, lightly beaten
1 c canned pumpkin puree
1/2 oil
2 c peeled, chopped apple (any sweet variety)

Streusel topping:

2 T flour
1/4 c sugar
1/2 t cinnamon
4 t butter

-Preheat oven to 350. Lightly grease 24 muffin cups or use paper liners.
-In large bowl sift together dry ingredients.
-In another bowl mix wet ingredients well. Add to dry ingredients until just mixed and moistened.
-Fold in apples. Spoon batter into cups.
-In a small bowl mix streusel ingredients (I like to use my hand) until nice and crumbly. Sprinkle on top of each muffin.
-Bake for 35 minutes or until toothpick comes out clean.

Sunday, November 15, 2009

Pigs in a Blanket

Doesn't this sound cozy with the cold weather here? Well, this is the world's easiest meal, and one the whole family loves.

Hot Dogs--your favorite brand (I only buy Oscar Meyer or Falls Brand beef franks)
Rhoades Rolls (same number as hot dogs) regular is fine, but Texas rolls are a little bigger and easier to roll around dogs.

Thaw rolls and let them raise a little. Let your hot dogs come to room temp, or microwave them for about 30 seconds. This aides in rising time. Wrap the hot dog in the roll. Roll out or just shape around. Seal the seam. Place seam side down on greased cookie sheet. Let them rise til about double. Bake 350 til rolls are golden (12-15 min usually). Serve with lots of ketchup! These are sooo good. They are always a hit!

Tuesday, October 13, 2009

Autumn Snack Mix from Sunday Baker

Photobucket
I am in love with this stuff! It's dangerous for me to have around because it is so hard to stop eating it and it's not exactly low-carb! I just love Sunday Baker, which is where I got this. It's nice to try a new snack mix. I made this one day as an after school snack for the kids and they loved it. You can add or subtract any candy you want. The good thing about this recipe is that it makes a lot (2 ice cream buckets) so it's great to give as a gift to your neighbors or friends. Yum!

1 box Peanut Butter Ritz Bits
1 bag mini-pretzels
1 large jar roasted peanuts (the more the better!)
1 bag regular m&m's
1 bag candy corn
1/2 c light corn syrup
1/2 c butter
2 T vanilla extract
1 t baking soda
1 c sugar

-In a very large sprayed roasting pan, or any pan with sides, mix pretzels, crackers, and peanuts.
-In a medium saucepan mix together sugar, butter, and corn syrup. Over medium heat bring to a boil, stirring constantly. Boil for 3 minutes or so (Sunday Baker said to boil 5 minutes, but I found that was too long and it hardened too fast so it wasn't gooey enough to evenly coat everything).
-Remove mixture from heat and add baking soda and vanilla. Mix well.
-Pour mixture over the pretzel mix and stir to coat everything.
-Pour into roasting pan and bake at 250 for 30 minutes, stirring after 15 minutes.
-When done, immediately pour onto wax paper. Let cool a few minutes then start breaking apart the big chunks. Let cool completely.
-When all cool, mix in candy corn and m&m's. Store in an airtight container for several days!

Wednesday, September 30, 2009

Cajun Black Beans with Sausage and Corn

This is a Betty Crocker recipe that I acquired recently. I thought it sounded like a nice, quick, healthy, easy weeknight meal so I gave it a try and as always made it my own with the ingredients I had. Honestly, I didn't really think that my family would care for it that much, but I was luckily wrong! It was very flavorful with the smoked sausage. I used some leftover corn off of the cob and fresh tomatoes from the garden. It would be good served alongside some rice. I don't want to forget about this one-so tasty.

2 T oil
2 cloves garlic, minced
1 bell pepper, any color, diced
1 onion, diced
1 1/2 c corn, frozen, canned, off cob, whatever
16 oz. smoked Kielbasa sausage, sliced
1/2 t salt
1/4 t fresh ground black pepper
1 1/2 c fresh tomatoes, chopped (could use canned)
1 can black beans, drained, rinsed

-In large skillet heat oil then add garlic. Cook and stir 1 minute. Add peppers and onions and continue cooking 2 to 3 minutes or until crisp-tender.
-Stir in corn, sausage, salt, and pepper. Cook 3 to 5 minutes, stirring occasionally.
-Stir in tomatoes and beans. Cook 3 to 5 minutes, stirring occasionally, until hot.
-Serves 6-8.

Thursday, September 17, 2009

Erika's Fresh Pear Tart

PhotobucketI have pears coming out of my ears! Our kind neighbors across the street let us have all the pears on their tree. To thank them, I have been looking for a nice little something to make them. After looking at several recipes online, I took a little of this and that from them and made my own recipe. Not only is this dessert impressive and nice to look at, it also tastes fabulous and it's so easy to make--fool proof! You can use fresh or canned pears, whatever you have.

CRUST:
1/2 c cold butter
1/3 c sugar
1/4 t almond extract (or vanilla)
3/4 c flour
2/3 c quick oats

FILLING:
8 oz. cream cheese, softened
3/4 c sugar
1 egg
1/2 t almond or vanilla extract
3-4 fresh pears, peeled and sliced
cinnamon sugar
whipped cream

-Mix all crust ingredients with a pastry blender until small crumbs. Press into a 10" tart/flan pan (with removable sides) covering bottom and up the sides.
-With an electric mixer, beat first 4 filling ingredients until smooth and creamy. Pour into crust and spread evenly.
-Arrange pear slices in a pretty design on top and sprinkle generously with cinnamon sugar.
-Bake at 450 for 10 minutes. Then turn down heat to 400 and bake for another 25 minutes.
-Place on cooling rack and let cool slightly. Remove sides and serve warm with whipped cream for garnish, if desired.
-Serves 8.

Tuesday, September 15, 2009

Home Canned Salsa ala Erika

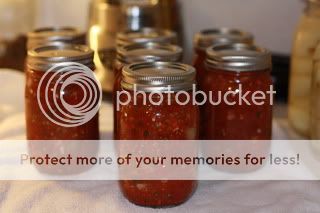
PhotobucketThis is a recipe I got from fellow blogger Afton last year. My family really enjoys it and since our supply is diminishing I was excited to make it again. I got a bunch of free produce from a neighbor with an incredible garden so I incorporated some of the things he gave me into the recipe and switched it around a bit. This is now homemade salsa ala Erika. I double this when canning, but it's wonderful fresh in a single batch and keeps in your fridge for a while. My thoughts are that if you're going to make the mess, you might as well make it worth your while and double it. One batch fits in my 4.5 quart pot, and when doubling I simply use two pots. I'd rate it medium in hotness. If you want it more on the mild side than I would take out the jalepenos and maybe even reduce chile peppers to one.

2 4.5 quart pots roma tomatoes (can use regular but drain really well)
15 cloves garlic, peeled and minced
2 large onions, chopped (any color will do)
2 jalepenos, seeded and diced
1 1/2 bunches chopped cilantro
2 chile peppers, seeded and chopped
2 bell peppers, seeded and chopped (red or green)
1 1/2 T salt
1/2 c red wine vinegar
1/4 c white vinegar

-Fill your 2 pots about 2/3 full of water. Bring to a boil. Put as many tomatoes as will fit in. Romas are so flavorful and not as watery as regular tomatoes so I prefer them.
-Leave tomatoes in for a few minutes.
-Take tomatoes out in colander, run under cold water, or you can dump them in sink full of cold water.
-Peel tomatoes. You can chop by hand, but I just put them in my blender (it worked better than my food processor.)
-In the pot that you used to boil the tomatoes, dump out water and you can now dump chopped tomatoes in. I like to keep a little of the tomatoes in the blender to help blend the other ingredients in better.
-To a little of the tomatoes, now add garlic, peppers, cilantro, and onion. Pulse to chop up. I like to hand chop some of the onions and all of the bell peppers so they are a little bigger and add some chunkiness to the salsa.
-Once all veggies are chopped and in pot, add salt and vinegar.
-Stir and bring to boil. Reduce heat and simmer about 15 minutes.
-Pour salsa in jars leaving 1/4 inch headspace. Remove any air bubbles with non-metallic spatula. Clean rims of jars with clean rag and put on lids and rings.
-Process 15 minutes in boiling water canner.
-Yield about 7 pints.
Photobucket

Monday, September 14, 2009

Best Steak Marinade EVER!

PhotobucketThis is the best steak marinade I've ever tried. No need for steak sauce when you have something this flavorful! The longer you marinate, the better flavor but I don't need to tell you that! Recipe and picture from Allrecipes.

1/3 cup soy sauce
1/2 cup olive oil
1/3 cup fresh lemon juice
1/4 cup Worcestershire sauce
1 1/2 tablespoons garlic powder
3 tablespoons dried basil
1 1/2 tablespoons dried parsley flakes
1 teaspoon fresh ground black pepper
1/4 teaspoon hot pepper sauce

1. Place all ingredients in blender. Blend on high speed for 30 seconds until thoroughly mixed.
2. Pour marinade over desired type of meat in large Ziploc bags or in a dish. Cover, and refrigerate for up to 8 hours. Cook meat as desired. Best on grill.
3. This is for 8 servings, which I used 8 steaks and it was enough marinade for that much meat.

Tuesday, September 8, 2009

Broccoli Chicken Potato Parmesan

From Dick's market and Holly!

2 T oil
1 lb. chicken cut into strips (2 breasts)
1 1/2lbs red potatoes sliced thin
2 cups broccoli, chopped to bite-size
1 can broccoli cheddar soup
1/2 cup milk
1/4 tsp garlic powder
1/3 cup fresh parmesan
Heat oil in skillet. Add chicken, season with what you like, and cook stirring till just done. Remove from pan. Add potatoes to left over oil. Cover and cook 10 mins stirring occasionally. Add a little more oil if getting too brown. Add broccoli, cook covered 5 mins. In a bowl, combine milk, soup and garlic powder. Pour into skillet along with the cooked chicken. Heat to boil and cook 5 minutes. Add parmesan and toss then serve. Makes 6 servings. I'm keeping this one in my binder! Fast and easy.

Tuesday, August 18, 2009

The Best Homemade Pizza in the World!


I have been on a quest for years to make pizza at home as good as at a restaurant. It has been a long road. I finally gave up 6 months ago on trying to make my own crust and just started using Rhoades bread dough. That made a big difference. Then this weekend I told Chris I would be making pizza this week. He asked if I'd put fresh garlic on it. He loves it. So, I agreed. The result was "The best pizza ever" (in my book anyway!) The garlic added so much flavor. I think it's what's been missing the whole time. Here it is:

1 loaf frozen dough, thawed (let it rise just a little and it's easier to shape)
I use a 16" pizza round (I like thinner crust), I have also used a big rectangle cookie sheet
Pizza sauce (I use traditional Prego spaghetti sauce, we like a sweeter sauce)
Mozzarella and Parmesan cheese (sometimes I add a little cheddar, too)

Toppings:
pepperoni
olives
mushrooms (I live with uncultured swine, who only like these 3 toppings)

Last night, I added the following to my half and Chris and I loved it:
zucchini, onions, red bell pepper, sliced thin and roasted in oven with olive oil and salt & pepper
fresh garlic, pressed and sprinkled on after the initial cheese (I used 2 med cloves)
fresh tomatoes, sliced

The order is: dough, sauce, mozz cheese, garlic, pepperoni and other toppings, more mozz and parmesan.

Bake at 425 for about 17-25 min. (give or take depending on amount of toppings) The crust needs to be nice and brown. You have to be patient or the middle will be doughy.
1 pizza feeds my family of 5, usually without leftovers.
Reheating tip: Pizza is always gross reheated...until now! Heat it up in a skillet on the stove. I put a lid on it, so the top gets hot faster. Watch it carefully, so you don't burn the bottom. It gets nice and crispy again. Closest thing to fresh pizza.
Enjoy!!!!!

Wednesday, August 12, 2009

Zucchini Brownies

Here's one more thing to do with your extra zucchini this year. This doesn't look like your typical brownie, but it is still delicious. As I was baking it, I thought I'd be disappointed, but the moistness and flavor are awesome!! I found this on Cooks.com.

3 c flour
4 T cocoa
1/2 t salt
1 t soda
1 t cinnamon (I used a little less)
1 c oil
1 3/4 c sugar
2 eggs, slightly beaten
1 t vanilla
1/2 c buttermilk (I was out, so I used some vinegar in whole milk)
2 c grated zucchini, squeeze out moisture
1 c chocolate chips
3/4 c walnuts

Combine first 5 dry ingredients, and set aside. Beat sugar and eggs til fluffy. Add oil and vanilla. Beat til fluffy. Mix in zucchini. Then add flour mixture and buttermilk alternating. Add chips and walnuts. Bake at 350 for 25-30 minutes in a 10x15 (I think that is jelly roll size) pan.

I omitted walnuts and used bittersweet chocolate chunks. MMMMMM!
I also misread the pan size and used a 9x13. (I looked at about 20 recipes before deciding on this one, and they all had different pan sizes!!) Don't do that. The middle didn't get done, and I had to chuck that part. Whoops!

Wednesday, July 29, 2009

Molten Cheeseburgers


These are delicious!! So juicy and oozy and huge! Come to the table hungry for this one! We saw this on The Food Network's Man v. Food last night. It's a good show. You get to watch a guy gorge himself with really good food in large portions!

Make hamburger patties really thin. They used 1/4# of burger, but I used less. I made 10 patties out of about 1 1/2# of burger. They were about 4 1/2 inches in diameter. We had a couple leak a little because we BBQ'd them, but nothing too bad. I think I might make them a tiny bit thicker, but not too much. They are huge. I cut waxed paper squares and just pressed out the meat right on them.

Place a patty on waxed paper on counter. Fold American Cheese in fourths and put in the middle of the patty. Put another patty on top leaving the waxed paper on top. Press the sides of the patties together to seal. (They had other cheeses on the menu--bleu cheese, pepper jack, Swiss. They said the original was the most popular, though.)

BBQ or cook on a griddle til done. Toast the bun, serve with ketchup, mustard, and the grilled onions are a must! We also added slices of garden tomatoes, because you must!

The only thing I would change is the bun. You need a giant one. I got the good kind from the bakery that you have to slice, but they were a little small and too delicate. Maybe a kaiser type or just the bigger Eddy's or Wonder buns would be better, though I loved the flavor of the wimpy ones.

Have fun with these. I think these would be fun for a party. Just give the kids regular burgers or hot dogs, though all three of my boys loved them. Two just had trouble finishing the whole thing!!!

Tuesday, July 21, 2009

Apricot Leather


This recipe can be adjusted for any kind of fruit you want to use. Just add the sugar slowly to taste. Dad's tip on drying them in the hot car worked like a gem! That way you won't heat up your house.

8 c blended apricots
2 T fresh lemon juice
1 c sugar or to taste

-Wash apricots, pull apart and take pits out. Put in blender and blend until smooth.
-Pour into bowl and add lemon juice and sugar. Mix thoroughly.
-Prepare pans by covering with plastic wrap. If you use large jelly roll size pans you'll need to use two strips of plastic wrap and overlap them in the middle really good. Leave a little extra hanging off all sides.
-Pour fruit on pan. You want it to be about 1/8-1/4 inch thick. This is a little hard to gauge but use your best judgment. Keep in mind that the thicker it is, the longer it will take to dry, obviously. I kind of move the pan around and shake it on a flat surface to get it nice and even and smooth.
-Now, you can dry this a few different ways. You can use the hot car as I previously mentioned. Just crack your windows and set the pans in but try to make sure they're as level as possible. Also try to use an alternate car if possible when you need to go somewhere. I drove Pierce down to his cousins, just down the road, and we had flying fruit leather. The car method took me about two days to get it completely dry and this was with very hot temperatures. You can also obviously use a food dehydrator if you have one. You can also dry this out in the sun but will need to put screens over it to keep the bugs out. They say this takes 24 hours but I've never tried it. You can also use your oven. Just turn it on a very low temperature like 140 degrees. Let dry in the oven for as long as it takes to get the puree completely dry. It should not be sticky to the touch. This may take 8-12 hours or you can just do it overnight. I've also heard of people tenting it with cheesecloth and drying it in the sun, or putting it in your BBQ with the lid closed in the hot sun.

-One thing you want to be careful of is don't let your plastic wrap fall down on the sides over the puree. It will not dry where the plastic wrap covers it. I know this because this happened to me. If you do it the long way in the car, the puree will start to ferment and mold and you don't want that, believe me. If necessary, tape your plastic wrap up on the sides of your pans to prevent this.

-When leather is ready, roll it up in the plastic wrap. I cut mine in serving size pieces and rolled them up. It really felt like I was cutting a piece of leather! Anyway, you can store these in an airtight container and they can even be frozen!

-4 c fruit yield about one large baking sheet of fruit leather.